Plant based Munchies

A journey towards whole food, plant based, healthy eating….


Leave a comment

Chocolate self-saucing pudding

Chocolate self saucing pudding

Yesterday was mothers day. And in honour of my own mother’s awesome desserts and the fact that it was Mothers Day so I decided I “deserve” whatever i felt like 🙂 I made chocolate self saucing puddings. It suits the cold wintery weather and the huge weekend we had had – warm, decadent comfort food!

As you know, I really really ‘hate’ ordinary food photography so I find myself once again apologising for the photo. It was late when we ate and we were all keen to get into it, so I took a quick snap on the dining table before digging in. Hopefully you get the gist – and next time I’ll have to try again with better lighting and effort!

My goodness, these were amazingly rich and decadent and delicious! And Mr 5 and I who made them up were surprised that they work so well. Mr 7 moaned and groaned in heaven for a while and then said “Did you make these up? You need to blog them!”.

Gluten free, totally plant based and sugar free. They just shouldn’t taste this good.

The little hole in the top is because I put a square of dark chocolate in the middle of them before baking (that bit is not sugar free) so it made an indentation in the top. You can take or leave that idea. They would look more impressive without it but it was a good surprise for the kids.


Ingredients

1 cup buckwheat flour

1/2 cup tapioca flour

1/3 cup cacao

1 tsp baking powder

1/2 tsp bicarb soda

3/4 cup non dairy milk + 1 tsp apple cider vinegar

1/2 cup brown rice syrup or agave

2 Tablespoons of grape seed or melted coconut oil

1 Tablespoon chia seeds soaked in 1/4 cup water

1 tsp vanilla extract


Sauce:

1 cup warm water

1/4 cup cacao

1/4 cup brown rice syrup or agave


Mix the dry ingredients and mix in wet ingredients. Divide into lightly greased ramekins. (Add in a piece of dark chocolate or raspberries into the centre now if you wish). Hold a spoon above the ramekins and poor sauce mixture onto spoon (So as not to cause a pooling in the middle- aka, the spoon will make the liquid spread out) until the sauce mixture is evenly spread across the ramekins.


Bake in 180 deg C oven for 30 minutes.
The kids served theirs with vanilla soy ice cream and Dave and I enjoyed a coconut milk-coffee ice cream with ours! Delicious – but we were each defeated! The left overs are in the fridge for todays enjoyment!!


1 Comment

Hot cross buns

Hot cross buns 
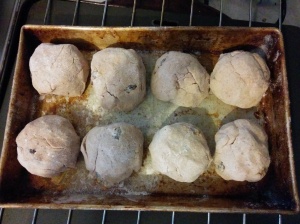
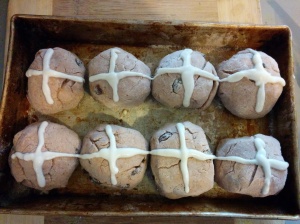
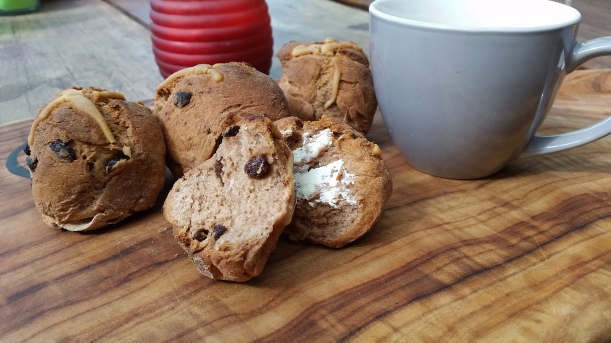
It’s Good Friday! Thank you to my brilliant husband, Dave, for having hot, gluten free vegan hot cross buns waiting for me on my arrival home from church on this Good Friday! Wooo! And I can attest to the winning combination these tasty treats are.

Firstly, it’s probably important to understand a little about how flours work when cooking with gluten free combinations. These buns have 50% medium flours, 25% light and 25% heavy. If you don’t have the exact flours, you can look here for more suggestions on how this works and use your own combinations. I think it is always safe to use more tapioca flour rather than less so feel free to use more light flour and less medium/heavy if you want to play with it.

Or…you can just follow this recipe. De-licious!

Dry ingredients: 

Medium:                   1 cup  red sorghum flour and ½ cup brown rice flour

Light:                        ½ cup tapioca flour and ¼ cup potato starch

Heavy:                       ½ cup buckwheat flour and ¼ cup almond meal flour

2 tsp xanthan gum

½ tsp salt

1/2 tsp all spice

1 tsp cinnamon

Wet ingredients:

4 dates blended in ¼ cup hot water

2 Tablespoons coconut palm sugar

2 teaspoons melted coconut oil

1 ½ cup warm water

¾ cup sultanas

Combine flour mix, xanthan gum, salt, sugar and dry yeast and mix together in a bowl. Set aside.

In a separate bowl, combine the coconut oil, warm water and pureed dates. Add in dry ingredients and mix on high with hand beaters until well mixed. Add sultanas and mix through.

Shape into a long thick roll and chop into sections ofHot cross buns pre-cooked
roughly equal size to form into rolls.

Place rolls on a greased & floured tray, cover with a tea towel and allow to rise in a warm place for 30 minutes.

For the crosses, mix some brown rice flour and water together to form a paste and squeeze onto rolls in a cross formation. (You can do this by putting the paste in a snap lock bag and cutting one corner off to squeeze through)

Hot cross buns c


Bake in 200 deg Celsius oven for 40 minutes.

Brush the tops of buns with a light coating of melted coconut oil after they come out for a gloss.

Our buns were brown and crunchy (which we enjoyed) but if you prefer them softer and less crunchy, put foil over the tray after 15 minutes of cooking.

Hot cross buns


Happy Easter everyone!


Leave a comment

Rich chocolate pots


Rich chocolate pots

Rich chocolate pots

Is anyone in the mood for a chocolate hit? (Actually, is anyone ever not in the mood…?)

These are rich and decadent. And they will surely satisfy any chocolate craving.

* This mixture made enough for 12 chocolate pots in medium sized cup cake papers.
Base:

1 cup raw cashews/macadamias or almonds

1/2 cup hazelnuts

12 pitted medjool dates

1/3 cup cacao

1 T water

Process the nuts until ground in a meal, then add remaining ingredients. Press spoonfuls into little cup cake holders until each has an equal base.


Top:

1 pkt silken tofu (non GMO)

100g dark (dairy free) chocolate, melted

1/3 cup cacao

2 T rice syrup

1/2 tsp coffee essence


Blend the tofu briefly until a creamy consistency. Add the remaining ingredients and process into a mousse. Spoon the mousse into cups on top of the base evenly, and bake in a 180deg C oven for 20 minutes.

Refridgerate for at least 1 hour before serving. Enjoy 🙂

Rich chocolate pots

Rich chocolate pots

* This recipe uses coffee essence for a richer flavour. You can sub this for espresso or even just vanilla extract (which at least does not have additives etc). You could also use Franjelico if you do alcohol, which has a hazelnut flavour. The recipe will also make a larger tart if you would prefer this to 12 little ones. I made these for a picnic which worked beautifully to serve them out individually!


Leave a comment

Sweet buckwheat waffles

Sweet buckwheat waffles

Sweet buckwheat waffles

Woweee. I have pronounced my love for Sloveig’s blog, the Gluten Free Vegan Girl many a time, and she has delivered again on this one. This is her recipe, it is pure, healthy and delicious. Breakfast, dessert, or snacks throughout the day – these waffles are awesome 🙂 I have to share.

I have halved the recipe because it makes LOADS. Also, my waffle maker sadly only does animal shapes (haha) so here we have a giraffe and a lion – looking slightly more like a map of Australia actually… not to worry!

I’ve also done this recipe with half buckwheat and half brown rice flour and I have to say, I really loved that also. It seemed a little lighter to me. But please yourself.


  • 2 cups unsweetened plant-based milk
  • 1.5 cups buckwheat flour
  • 1 cup pitted dates
  • 1.5 tsp baking powder
  • 1 tsp vanilla [extract]
  • 1/4 tsp maldon salt
  • 1/2 tsp ground cardamom, optional but recommended
  • juice from 1/2 lemon, optional but recommended

Directions:

1. Place all the dry ingredients together in a mixing bowl and stir together.

2. Place the pitted dates, lemon juice, vanilla essence and milk in a high-speed blender (or use a hand blender) and run until completely smooth. Pour this into the bowl with the dry ingredients and stir until well-combined. Keep in mind that the batter will be slightly thicker than regular wheat waffles. Do not add any more liquid to make it thinner! This will prevent the batter from sticking together properly, and you will end up with a runny gooey mess.

3. Heat a waffle maker and add your mixture. Depending on your maker, you may need spray oil to stop it sticking. I use brushed melted coconut oil.


Sweet buckwheat waffles

Sweet buckwheat waffles

I have added fresh chopped strawberries and a homemade chocolate hazelnut sauce. Try this:


2 dates, pitted, soaked and pureed (alternatively substitute with rice malt syrup)

1 heaped Tblspn cacao

2 Tblspn melted coconut oil

1 heaped Tblspn hazelnut meal

2 Tblspns non dairy milk

dash of vanilla extract
Whisk together and enjoy. Add more milk if you prefer it runnier.


3 Comments

Green peppermint slice

Green peppermint slice

Green peppermint slice

This slice converted my 3yo to peppermint. Woohoo 🙂 Not to mention it being the usual – gluten free, vegan, sugar free and absolutely yummy. I have another peppermint slice that I made up on this blog but I have to say, this one is much easier and very delicious.

Base

2 cups walnuts

20 medjool dates, pitted (and soaked if not already soft)

1/4 cup cacao powder

1 heaped T coconut oil

pinch salt

Blend the walnuts in a food processor, then add remaining ingredients. Once blended, press into lined tin and pop in the freezer.

Peppermint layer

1 cup dessicated coconut

3/4 cup macadamias

1/4 cup coconut oil

3 T rice syrup or coconut palm sugar

handful of fresh mint leaves

1 tsp peppermint extract

drizzle natural green food colouring if desired

Process coconut and macadamias into a fine consistency before adding other ingredients. Process, then spread over chocolate base and return to the freezer.

Top

1/4 cup cacao powder

1/2 cup melted coconut oil

1/4 cup rice syrup

1 tsp vanilla

Melt coconut oil and stir in remaining ingredients until smooth. Pour over peppermint layer and refrigerate until set. *Actually i put mine in the freezer and was able to cut the slice into squares after about 10 minutes. It does not take long!

Really, this is beautiful. I got a great idea from another site about whizzing up goji berries as a red festive splash and this is what is sprinkled on the top of the platter of slice pieces. Enjoy! And merry Christmas!


(And this is what it looks like with a festive sprinkle of chopped goji berries:)

P1150496-001


Leave a comment

Orange chocolate fudge cakes

Chocolate fudge cakes

Chocolate fudge cakes

I have always loved orange chocolate. I know it’s not everyone’s favourite but wow, I used to consume a lot of it. My favourite was about 15 years ago when Crunchies brought out an orange version. Wowww….my house mate and I used to stock up on them and lucky we did because they didn’t hang around long! We thought perhaps we were the only people buying them!

15 years later and I would get an instant migraine if I tried to eat a crunchie now anyway 🙂 And let’s face it, they are not great on a number of levels. Lucky I can cook!

Early in my blogging days I posted links to recipes relating to red kidney bean cakes and to be honest, I haven’t ever made them since. Today I thought I would dig it out and revamp the recipe. It truly is incredible to me that these work as cakes – with no butter, no sugar, no flour, no eggs. The staples. But truly, these work. And they are a brilliant fibre and protein hit for kids on the go.

I blended some dates and almond butter into a caramel and pasted them on top for “icing” but they are great without it.  You don’t have to make them orange of course. You can just do straight chocolate. Or add in some peanut butter for something different.

Ingredients:

1 tin red kidney beans (rinsed and drained)

2 tsp vanilla extract

8 dates (pitted and soaked)

2 T rice malt syrup

2 T (heaped) cacao powder

1 tsp baking powder

1/2 tsp bicarb soda

1-2 tsp orange zest

1/4 cup orange juice

Process the red kidney beans in a food processor (keep scraping down the sides, you DONT want bean lumps in your cakes :)). Add vanilla, syrup and dates and process further. Add remaining ingredients and process until mixed.

Spoon into muffin tins and bake at 180 deg C for 25 minutes or until cooked.


5 Comments

Choc chip cookies

Choc chip (Chick pea) cookies

Choc chip (Chick pea) cookies

It is so remiss of me not to have this on the blog, given how often we make them. I kind of thought everyone knew of this recipe – I can’t claim it as mine because it is ALL over internet land. But it turns out not everyone does!

So quick, I better post this so we can spread it even further around internet land. It really is a healthy, nutritious take on an age-old favourite. And I make double the recipe now because they disappear too quickly!

Ingredients:

2x 400g tins chick peas, rinsed and drained

1 cup peanut butter (100% peanuts )*

1/2 cup brown rice syrup

1 1/2 tsp baking powder

2 rows dark chocolate, chopped

Blend all ingredients except dark chocolate together in a food processor (I do the chick peas first then add the rest). Then stir through dark chocolate pieces.

The mixture will be sticky but I still roll into a ball and press flat onto baking paper on a tray. Alternatively you can just “drop” teaspoons onto the paper. Whatever shape they are on the baking tray is what they will remain (they don’t grow or flatten with cooking).

Bake at 180 deg C for 15 minutes or until browning.

* As always i recommend 100% peanuts for your peanut butter. FYI, the health food shop I go to has  a peanut butter machine – you bring a bucket, and pull the handle, and it will grind the peanuts into peanut butter straight into your bucket. It’s brilliant! Check out if yours does it too?


Leave a comment

Apple, walnut and dark chocolate crumble

Apple  and chocolate crumble

Apple and chocolate crumble

If only I had a picture to actually match the heaven that is this dessert. It is one of the easiest desserts imaginable and is a  different take on the oat-butter-brown sugar type apple crumble. Oh my, it is moorish. The apple and dates are warm and sweet and soft, matched with the crunchy, flaky top that is walnuts, and the chewy, sweet dates and dark chocolate.

Ok, so the dark chocolate is not a whole food choice. But in tiny bits of joy we can cope, can’t we. And I’m told it’s good for your health in moderation.


Ingredients

5 green apples, peeled and chopped

6 dates, pitted and diced

1 cup walnuts

1 row dairy free dark chocolate

sprinkling of ground cloves and cinnamon


Preheat oven to 180 deg C. Steam/boil the apples, spices and half of the dates for a few minutes until softened. Drain, and place in a casserole dish. Grind the walnuts down in a food processor, stir in the remaining chopped dates and chopped dark chocolate. Sprinkle mixture over the top of the apple/date mix.

Bake for 15 minutes or until heated through and crispy on top.


And then make some more for breakfast the next day 🙂


Leave a comment

Caramel fudge

Caramel, the healthy way

Caramel, the healthy way

I have noticed that my blog followers are total caramel freaks. Sweet freaks generally but definitely caramel lovers and hey, I can’t blame you.

I remember as kids we used to make caramel (the burnt butter/sugar kind of caramel) and OMG how delicious was that as a teenager, scooping spoonfuls of caramel out of the fridge. I remember hoping no one would notice how MUCH of it I was eating 😉

Today…same issue but a much different version of caramel! So many of you have commented on how YUMMY the caramel is in the slice or the cheesecake so I thought it time just to serve it up direct! Yes. You can thank me later 🙂

Ingredients:

25 pitted medjool dates (presoaked in hot water for 10 minutes and drained)

1/2 cup almond spread

1 T coconut oil

And that’s it. You can add a tsp vanilla extract and a pinch of salt. But the reality is, the caramel is caramel already. You could also add some peanut butter.

And I drizzled melted dark chocolate on top of mine to make it pretty 🙂 But all in all, that’s just dressing. You just need dates and almond spread (which is 100% almonds).
It’s soooo good. I just had a spoonful after dinner and trust me, it is SOO sweet that’s all you need!


*NB this is a gooey caramel. If you like it a little firmer, add in some blended macadamias or tahini and freeze.


Leave a comment

Layered caramel cheesecake

Layered caramel cheesecake

Layered caramel cheesecake

This cheesecake was an experiment, but one that I would happily remake. I was about to say the layers on their own are nothing that spectacular but together they make magic… but that’s not true. That caramel is MOORISH.

We tried it frozen and at something closer to room temp, and definitely like it frozen better! It is very sweet and a little bit salty. The cheesecake layer is thankfully a little plain to mix with the caramel topping. It’s just heaven. It’s one of the more labour intensive desserts I have but well worth it. And it freezes beautifully 🙂

*For those sweet tooths out there, you might want to taste the cream cheese layer and decide for yourself if you like it sweeter. I actually decided it was better with some tartness to it to mix with the caramel but that will be up to your tastebuds.

Base:

1 cup pecans

1 cup almonds

1 cup pitted medjool dates (12 dates)

1 T coconut oil

1 tsp vanilla extract

pinch salt

Process the nuts finely in a food processor. Add remaining ingredients and press into cheesecake tin to form a base.

Cheesecake layer:

2 x organic soy cream cheese (I used KIng Land)

1/2 cup rice malt syrup

1 tsp vanilla

Blend together and pour onto base. Bake at 180 degrees C for 20 minutes, then allow to cool and freeze.

(You can add 2 T of corn flour or  tapioca flour to thicken it in the mix if you like a firmer cheesecake at room temperature)

Caramel topping:

15 medjool pitted dates, soaked (for at least 20 minutes in hot water)

1/4 cup almond spread

2 T coconut oil

pinch of salt

Process ingredients in food processor.

*If your cheesecake layer is frozen and firm, you can press the caramel topping down on top and smooth out. If it is still soft in the centre, (as mine was), roll the caramel layer out between two pieces of baking paper, using a rolling pin. The layer will then be smooth and sit evenly on the top of the cheesecake without damaging the layers.
Refrigerate or freeze (depending on how you like your cheesecake!) until ready to serve. The entire cheesecake can be made ahead of time and frozen until required. We really enjoyed this frozen!

Layered caramel cheesecake

Layered caramel cheesecake


3 Comments

Raw chocolate raspberry pots

Chocolate raspberry pots

Chocolate raspberry pots

Hello lovelies!

Sorry I have been MIA lately – and will continue to be for another couple of weeks. We are off on a camping adventure! So I’ve decided to release this most magnificent of magnificent recipes to keep your inspiration flowing 😉

It has a macadamia base: macadamias are absolutely gorgeous and probably my favourite nut. I don’t know why I don’t use them more often….oh yes I do…they’re quite expensive!

Anyhow these “pots” are little treasures. Chocolate and raspberries are made to go together. Like…I can’t think of a single analogy? What goes together? Salt and pepper? Or are they opposites?

I better stick with recipes.

Try these. That’s all I have to say. They are gorgeous 😛

This recipe made 12 mini muffin tray  size “pots” and 2 large muffin size ones. You could easily make 6 muffin sized pots. Or make one large one and slice it into wedges with a knife like a cheesecake.

Base

1 cup raw unsalted macadamias

7 pitted medjool dates

1 dessertspoon raw cacao

1 tsp vanilla extract

Filling

1 cup rasberries

1 dessertspoon rice syrup

Ganache

1/4 cup cacao

1/4 cup coconut cream (not the water, just the top creamy part)

1/4 cup rice syrup

6 pitted medjool dates

Blend the macadamias in a food processor until fine and add remaining base ingredients. It should be quite soft and fudgey. Spoon into mini muffin trays or your pot of choice and press down firmly. Place indentation in the base to allow the filling to sit in a crevasse. Refrigerate.

Blend the raspberries and rice syrup together and add a spoonful onto each base. Freeze (the ganache will cover the filling much more easily if cold/frozen)

Blend all ganache ingredients together to form a rich mousse consistency. Add to the top of your rasperry pots and refrigerate until ready to eat! You can also serve straight away if desired.

Absolutely heavenly. And quite rich! Beware!


3 Comments

Chocolate mousse tart

Chocolate mousse tart

Chocolate mousse tart

This is a recipe my sister put me onto from Wholefoodsimply. It’s healthy, it’s yum and it’s good! It is vegan, gluten free, sugar free and nut free.

Having said that, next time I’ll add nuts to the base because I think I would prefer that. The coconut cream mix on top was beautifully creamy and needed to soften the potency of the sweet chocolate layer and base! A good recipe to have on hand!


Base

1 cup coconut

4 medjool pitted dates

Blend together and press into individual tart pots or as I did by doubling the recipe, use a round tart tin (lined). Refrigerate.

*FYI next time I will replace half the coconut with ground almonds or ground hazelnuts. I think the nuts would be a welcome addition actually but it’s good to have nut free recipes!


Middle

1 avocado

1 ripe banana

1 T coconut cream

4 medjool dates (pitted and soaked)

1 tsp vanilla extract

1 T cacao

pinch of salt

Blend on high until processed and smooth and spread on top of the base and refrigerate.


Top

300gm cold coconut cream (the thick part)

2 T rice malt syrup

2 tsp vanilla extract

Blend, and spread over the filling and refrigerate.


This could need a couple of hours in the fridge, or you can speed freeze it 🙂

We actually only ate half as it is quite rich so I have frozen the rest and cut off a slice as needed, lol! Quite helpful!


1 Comment

Apple, rhubarb and date tart

Apple, rhubarb and date tart

Apple, rhubarb and date tart

My profuse apologies for being MIA lately. We have had our youngest in and out of hospital lately with a mystery stomach illness. Well…probably not so much a mystery anymore (mesenteric adenitis). FYI: don’t ever get that. It’s horrendous.

I’m going to be posting a couple of apple tart/pie recipes coming up. They are different from each other but both yummy and very healthy. This one is super rich and sweet from the date content.

Firstly let me say, I SO love Gluten Free Vegan Girl. And this is mostly her recipe. Well, it’s based on it anyway.

She has a cashew base but I used almonds because that’s what I had. She uses oats but I don’t think I digest them well so I swapped it for buckwheat/tapioca flour. She has an apple and date filling but I had rhubarb from mum’s garden so I threw that in there too.

But hey. I love the site AND the recipe/s.

Crust

2 cups almonds (or cashews)

1 cup brown rice flour

1/2 cup tapioca flour

1/2 cup buckwheat flour

20 pitted fresh dates

1/3 cup water

1 tsp vanilla

pinch salt

Blend ingredients together in food processor (blend the nuts into a fine flour first) and press into a lined tin. It is possible to roll it flat and lay it in the dish first if you prefer. Prick the crust with a fork and bake at 180 degrees C for 15 minutes.

(Gluten free vegan girl splits the dough in half and uses half for a base and half for a top to make it a pie. I used some for decorations on top but did not do this, although it looks like it works beautifully).

For the filling,

you can do a mix of whatever fruits you prefer. Gluten free Vegan girl uses 4 apples and the date mix (to follow). I used some pureed steamed apple and rhubarb, 1 chopped apple and the date mix. I would be really keen to do a blueberry one too at some stage.

Whatever you do, toss your fruit through a date mix which makes a gorgeous caramel texture and sweetness to the pie/tart:

2 cups dates (pitted and fresh)

juice of 1/2 lemon

1 tsp vanilla

cloves/cinnamon/allspice etc if you wish

Fill the pie base with your fruit mix and either pop on your pie lid or top with decorations/strips of the dough. Or as you can see I also laid apple wedges around the top of mine. Anything is possible.

Pop the pie/tart back in the oven. If you have a pie lid, bake for at least 30-45 minutes until the lid is cooked.

If not, you will only need to bake it for about 20-30 minutes.

Enjoy!


3 Comments

Chocolate fudge brownies

Chocolate fudge brownie

Chocolate fudge brownie

Good news! Tomorrow (Sunday) is World Chocolate day! Oh, so many ways to celebrate!

Today’s gem is a chocolate fudge brownie recipe- gluten free, vegan, sugar free goodness. I put almonds in it but honestly, if I had pistachios or hazelnuts on hand I probably would have used that! This is delicious! And guilt free. It is best cold – and goes slightly mousse-y if left out of the fridge or if not baked long enough in the first place. Either way, it wins. Enjoy!

(This recipe is adapted slightly from Femfusionfitness)

Ingredients:

15 Medjool dates (pitted)
3/4 cup hot water
1 Tbsp coconut oil
2 tsp pure vanilla extract
2 tsp finely ground coffee or espresso
1/2 cup raw cacao powder
1/4 cup  almond flour
1/2 cup brown rice flour
1/2 tsp baking powder
1/4 tsp  salt

Plus 1/4 cup roughly chopped nuts (add at end)

Soak the dates in hot water, coconut oil and coffee mixture. Blend the dry ingredients together and add all into a food processor and process. Stir in roughly chopped nuts of choice and press into a lined 8/8inch baking tray/dish and bake at 180 deg C for 15 minutes.

Let cool, refrigerate and enjoy for World Chocolate day! Woo!

Chocolate fudge brownies


4 Comments

Chocolate peppermint slice

Chocolate peppermint slice

Chocolate peppermint slice

I just adore these adaptable recipes! This is vegan, gluten free and pretty healthy in the scheme of things!

You could make this a raw slice by creating a base out of nuts/dates/cacao. Or use flour etc and bake it like I have. You could also make the middle out of a silken tofu base rather than coconut (although it will form a soft pie-like centre instead). I had a lot of trouble deciding on each layer but was happy with the result!
Had a 3 year old yapping at me for a taste so the photo was a bit rushed but it tastes good, I swear :). Hope you enjoy!
Base:
1.5 T chia seeds (chia meal if preferred)
1 T apple cider vinegar
1/4 cup  rice syrup
1/4 cup coconut oil, melted
Mix together.
Add:
1 cup  nut meal (I used a combo of almonds and walnuts, processed in food processor)
1/2 cup coconut flour
1 tsp baking soda
1 tsp baking powder
2 T cacao
Mix ingredients together and press into lined baking tin. I used a 9 ” round.
Bake at 180 deg C for 15 minutes. Allow to cool.
Centre:
1 cup shredded coconut
2 tsp coconut oil, melted
1 T agave nectar
1/4 cup coconut cream, chilled
1 tsp peppermint extract (but start small and add this to taste!)
Add the coconut, oil and nectar to the food processor and process away until it begins to smooth. This takes a long time so walk away and do something else rather than watch it! It will get there! Then add the coconut cream and peppermint and mix.
Press on top of the base and refrigerate whilst making the top layer.
Top:
2 T cacao
1/4 coconut oil
2 T agave (or rice syrup)
4 squares dark chocolate, melted
Melt the coconut oil and dark chocolate and stir in the cacao and agave. Pour over the peppermint layer and set in fridge.
* You can use all dark chocolate for this or leave it out completely and add more cacao and agave. I like the combination of both but either or all options will work well.
This recipe is a combination of so many things! Each has been adapted but the base is based on the Spunky Coconut, the centre is based on Fork and Beans